Janus is a cutting-edge AI system designed to handle both image and text tasks, excelling in two key areas: understanding and generating images. It can analyze images to answer questions or produce entirely new visuals from descriptions. What sets Janus apart is its dual-pathway approach to processing images. While earlier systems like Chameleon used a single method for both understanding and generation, Janus takes a more specialized route. It employs one pathway for detailed image comprehension and another for image generation, akin to having two experts rather than one generalist. This targeted strategy, combined with a unified overall framework, has resulted in superior performance compared to systems that relied on a one-size-fits-all model.
Let’s start with understanding what Janus is.
Janus is an innovative autoregressive framework (i.e It predicts the next word/token based on all previous words) that bridges the gap between multimodal understanding and generation. It efficiently processes both text and images within a unified system, using specialized tokenization techniques for each modality. Janus can interpret and generate content across these formats seamlessly, making it highly versatile for tasks like text-based queries, image generation, and visual-textual understanding. By aligning text and image features in a single transformer model, Janus simplifies complex interactions between modalities, paving the way for advanced applications in AI-driven creativity and comprehension.
Janus 1.3B processes text by using a built-in tokenizer that converts words into numerical IDs the model can interpret. For images, Janus employs a specialized encoder called SigLIP, which transforms raw images into feature sequences aligned with the model’s input structure.

In image generation, Janus adds another layer of sophistication. It utilizes a VQ tokenizer to convert images into a series of IDs just like text. These image IDs are transformed into codebook embeddings and passed into the model. Janus processes both text and image inputs in a unified manner: it predicts text using its built-in head, while a custom prediction head generates images. All this happens within an autoregressive framework, meaning Janus predicts the next step whether it’s text or image sequentially, without requiring complex tweaks or adjustments. This seamless integration of text and image modalities sets Janus apart, making it a powerful tool for multimodal tasks.
Step 1: Clone the git repository
First, let’s clone the Janus repository from GitHub:
!git clone https://github.com/deepseek-ai/JanusStep 2: Change the Working Directory
Navigate to the cloned repository’s directory:
!pwd # Check Current Directory

import os

os.chdir('/content/Janus') #Change to Janus Directory

!pwd # Verify the new directory
Step 3: Install Required Libraries
Now lets install the necessary libraries from the requirements.txt file to ensure that all dependencies are in place:
!pip install -e .Step 4: Install Flash attention
To enable FlashAttention (which significantly boosts attention mechanism performance), install it.
Note:- FlashAttention requires higher-end GPUs, like Ampere or newer, and may not work with free-tier GPUs of Google Colab
!pip install flash_attn --no-build-isolationStep 5: Import Necessary libraries and Load Model
Now, Let’s import the necessary libraries and load the model for multimodal understanding:
import torch

from transformers import AutoModelForCausalLM

from janus.models import MultiModalityCausalLM, VLChatProcessor

from janus.utils.io import load_pil_images

# specify the path to the model

model_path = "deepseek-ai/Janus-1.3B"

vl_chat_processor: VLChatProcessor = VLChatProcessor.from_pretrained(model_path)

tokenizer = vl_chat_processor.tokenizer
Step 6: Prepare the Input Conversation
In this step we will prepare a conversation where the user requests to convert an equation from an image into LaTeX code:
vl_gpt: MultiModalityCausalLM = AutoModelForCausalLM.from_pretrained(

    model_path, trust_remote_code=True

)

vl_gpt = vl_gpt.to(torch.bfloat16).cuda().eval()

conversation = [

    {

        "role": "User",

        "content": "<image_placeholder>\nConvert the formula into latex code.",

        "images": ["images/equation.png"],

    },

    {"role": "Assistant", "content": ""},

]
Step 7: Load the Image:
Now let’s load the images provided in the conversation and prepare them for input to the model:
# load images and prepare for inputs

pil_images = load_pil_images(conversation)

prepare_inputs = vl_chat_processor(

    conversations=conversation, images=pil_images, force_batchify=True

).to(vl_gpt.device)

# run image encoder to get the image embeddings

inputs_embeds = vl_gpt.prepare_inputs_embeds(**prepare_inputs)
Step 8: Generate and Print the Response
Now we can run the model to generate the LaTeX code based on the image and conversation. Then, we can decode the generated tokens and print the output:
# # run the model to get the response

outputs = vl_gpt.language_model.generate(

    inputs_embeds=inputs_embeds,

    attention_mask=prepare_inputs.attention_mask,

    pad_token_id=tokenizer.eos_token_id,

    bos_token_id=tokenizer.bos_token_id,

    eos_token_id=tokenizer.eos_token_id,

    max_new_tokens=512,

    do_sample=False,

    use_cache=True,

)

# Decode and print the answer

answer = tokenizer.decode(outputs[0].cpu().tolist(), skip_special_tokens=True)

print(f"{prepare_inputs['sft_format'][0]}", answer)Step 1: Import Libraries:
We start by importing the required libraries:

import os

import PIL.Image

import torch

import numpy as np

from transformers import AutoModelForCausalLM

from janus.models import MultiModalityCausalLM, VLChatProcessor
Step 2: Load Model and Processor
Next, we load the pre-trained model and processor:
# specify the path to the model

model_path = "deepseek-ai/Janus-1.3B"

# Load the processor and tokenizer

vl_chat_processor: VLChatProcessor = VLChatProcessor.from_pretrained(model_path)

tokenizer = vl_chat_processor.tokenizer

# Load the multimodal causal language model

vl_gpt: MultiModalityCausalLM = AutoModelForCausalLM.from_pretrained(

    model_path, trust_remote_code=True

)

vl_gpt = vl_gpt.to(torch.bfloat16).cuda().eval()
Step 3: Prepare Text Prompt
Let’s set up the input prompt for image generation:
conversation = [

    {

        "role": "User",

        "content": "A stunning princess from kabul in red, white traditional clothing, blue eyes, brown hair",

    },

    {"role": "Assistant", "content": ""},

]
Step 4: Format the Prompt
Now the conversation is formatted into a structure that can be used by the model:
sft_format = vl_chat_processor.apply_sft_template_for_multi_turn_prompts(

    conversations=conversation,

    sft_format=vl_chat_processor.sft_format,

    system_prompt="",

)

prompt = sft_format + vl_chat_processor.image_start_tag
Step 5: Define the Generation Function
Here we will define a function to generate an image based on the prompt:
@torch.inference_mode()

def generate(
    mmgpt: MultiModalityCausalLM,

    vl_chat_processor: VLChatProcessor,

    prompt: str,

    temperature: float = 1,

    parallel_size: int = 16,

    cfg_weight: float = 5,

    image_token_num_per_image: int = 576,

    img_size: int = 384,

    patch_size: int = 16,

):

    input_ids = vl_chat_processor.tokenizer.encode(prompt)

    input_ids = torch.LongTensor(input_ids)

    tokens = torch.zeros((parallel_size*2, len(input_ids)), dtype=torch.int).cuda()

    for i in range(parallel_size*2):

        tokens[i, :] = input_ids

        if i % 2 != 0:

            tokens[i, 1:-1] = vl_chat_processor.pad_id

    inputs_embeds = mmgpt.language_model.get_input_embeddings()(tokens)

    generated_tokens = torch.zeros((parallel_size, image_token_num_per_image), dtype=torch.int).cuda()
Step 6: Image Decoding
Let’s decode the generated tokens into an image:
for i in range(image_token_num_per_image):

        outputs = mmgpt.language_model.model(inputs_embeds=inputs_embeds, use_cache=True, past_key_values=outputs.past_key_values if i != 0 else None)

        hidden_states = outputs.last_hidden_state

        logits = mmgpt.gen_head(hidden_states[:, -1, :])

        logit_cond = logits[0::2, :]

        logit_uncond = logits[1::2, :]

        logits = logit_uncond + cfg_weight * (logit_cond-logit_uncond)

        probs = torch.softmax(logits / temperature, dim=-1)

        next_token = torch.multinomial(probs, num_samples=1)

        generated_tokens[:, i] = next_token.squeeze(dim=-1)

        next_token = torch.cat([next_token.unsqueeze(dim=1), next_token.unsqueeze(dim=1)], dim=1).view(-1)

        img_embeds = mmgpt.prepare_gen_img_embeds(next_token)

        inputs_embeds = img_embeds.unsqueeze(dim=1)

    dec = mmgpt.gen_vision_model.decode_code(generated_tokens.to(dtype=torch.int), shape=[parallel_size, 8, img_size//patch_size, img_size//patch_size])

    dec = dec.to(torch.float32).cpu().numpy().transpose(0, 2, 3, 1)

    dec = np.clip((dec + 1) / 2 * 255, 0, 255)

    visual_img = np.zeros((parallel_size, img_size, img_size, 3), dtype=np.uint8)

    visual_img[:, :, :] = dec
Step 7: Save Generated Images
Once the images get generated, we can save them to a specified directory:
os.makedirs('generated_samples', exist_ok=True)

    for i in range(parallel_size):

        save_path = os.path.join('generated_samples', "img_{}.jpg".format(i))

        PIL.Image.fromarray(visual_img[i]).save(save_path)
Step 8: Run the Generation Process
Finally, we call the generate() function to start the image generation process:
generate(

    vl_gpt,

    vl_chat_processor,

    prompt,

)Input Image:-
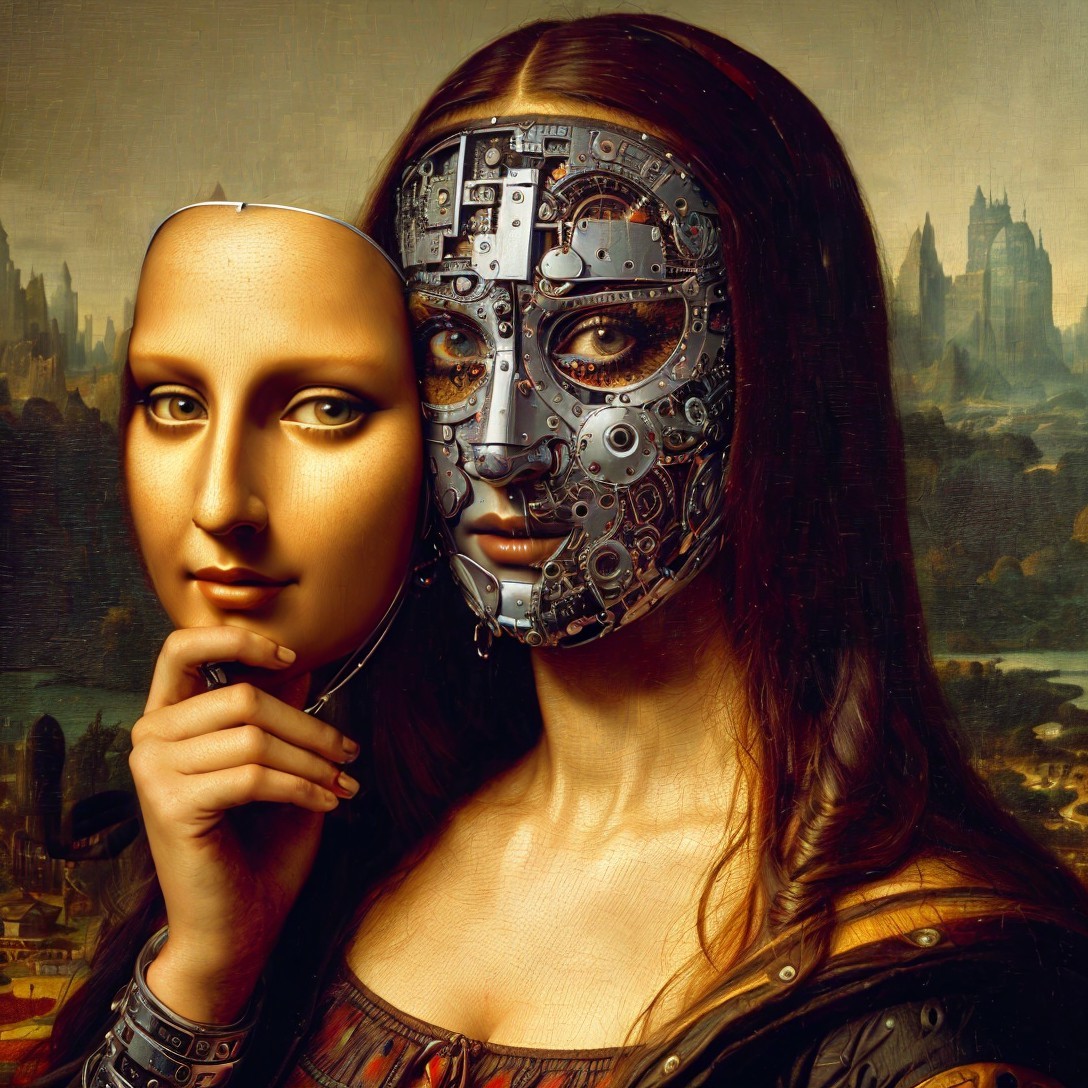
Input Prompt:- What can be seen in this image?
Response:-
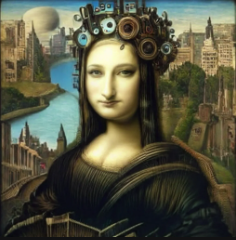
Let’s try to give the same output which was given earlier for the Monalisa Painting
Input prompt:-
The image depicts a surreal and artistic rendition of the famous painting “The Mona Lisa,” where the face of the Mona Lisa is replaced by a mechanical face. The mechanical face is composed of gears, cogs, and other industrial components, giving it a steampunk aesthetic. The background of the image features a cityscape with buildings and a river, which is reminiscent of the famous painting’s setting. The overall effect is a blend of classical art and modern technology, creating a visually striking and thought-provoking image.
Response:-
Janus stands as a remarkable breakthrough in multimodal AI, revolutionizing how machines process and interact with text and images. By ingeniously integrating these capabilities within a unified framework, it has transcended the limitations of traditional single-pathway systems. Its dual expertise—seamlessly generating text from images and creating vivid visuals from descriptions—opens unprecedented opportunities across diverse fields, from creative arts to scientific research. The system’s intuitive design and powerful performance make complex tasks accessible, setting a new standard for human-computer interaction. As we stand at the frontier of AI advancement, Janus not only showcases the current possibilities of multimodal AI but also illuminates the path toward more sophisticated, versatile, and intuitive AI systems that will shape our technological future.